



HOW TO SOUNDPROOF A RECORDING STUDIO, REHEARSAL ROOM OR MUSIC CLASSROOM
Professional soundproofing for musicians, producers and teachers
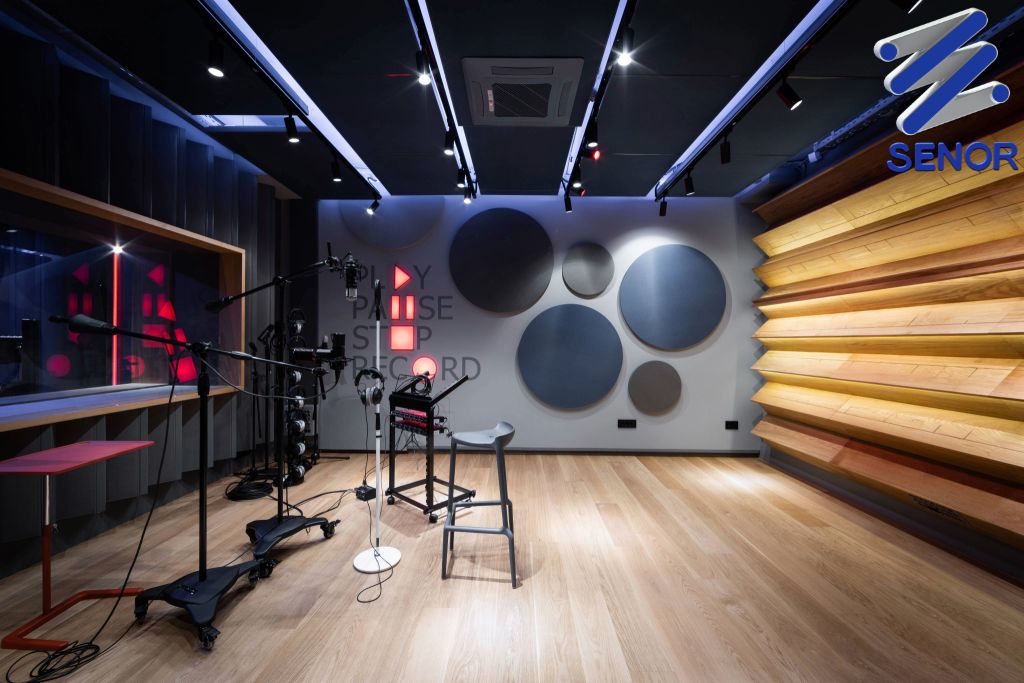
🎧 Why is soundproofing so important in music spaces?
Whether it is a home recording studio, a professional rehearsal room or a school music classroom, they all have one thing in common: they generate sound… and they do not want that sound to be heard outside.
The opposite is also true: we do not want external noise (traffic, neighbours, building services…) to enter the room and ruin a recording or concentration.
In short:
- Prevent sound from escaping → To avoid disturbing other neighbours, classrooms, offices or homes.
- Prevent sound from entering → To ensure clean listening without interference.
- Improve the sound inside → For recordings, rehearsals and lessons with good sound quality.
🔍 Difference between soundproofing and acoustic treatment
These two concepts are often confused. Let’s clarify them:
| Type of intervention | What does it achieve? | How is it achieved? |
| Soundproofing | So that sound does not enter or leave the space | By adding mass, decoupled systems, airtightness, etc. |
| Acoustic treatment | So that sound inside the room is clear, without echo or reverberation | Using acoustic absorbers, diffusers, bass traps, etc. |
🔗 If you would like to understand this difference in more detail, you can read our article:
👉 Differences between soundproofing and acoustic treatment
In this article we focus exclusively on soundproofing.
❗ What you need to consider for effective soundproofing
Soundproofing a music room, studio or classroom requires more than simply adding materials. You need to plan the complete system correctly, prioritising decoupling, airtightness and quality workmanship.
🧭 Recommended installation sequence
As a general rule, for optimum performance, we recommend following this installation sequence:
- Acoustic ceiling (direct or self-supporting)
- Install it first to make assembly easier and prevent acoustic bridges with wall linings or the floor.
- Acoustic wall linings (direct or self-supporting)
- Once the ceiling has been installed, the walls can be lined without structural interference.
- Acoustic floor (lightweight wood or heavy concrete)
- Installing it last helps seal junctions properly and reduces the risk of unwanted sound transmission through contact.
🔗 You can find more information in our dedicated article:
👉 Installation sequence for acoustic systems: ceiling, wall lining, partition and floor
🛠️ Recommended materials:
🔊 Ceiling
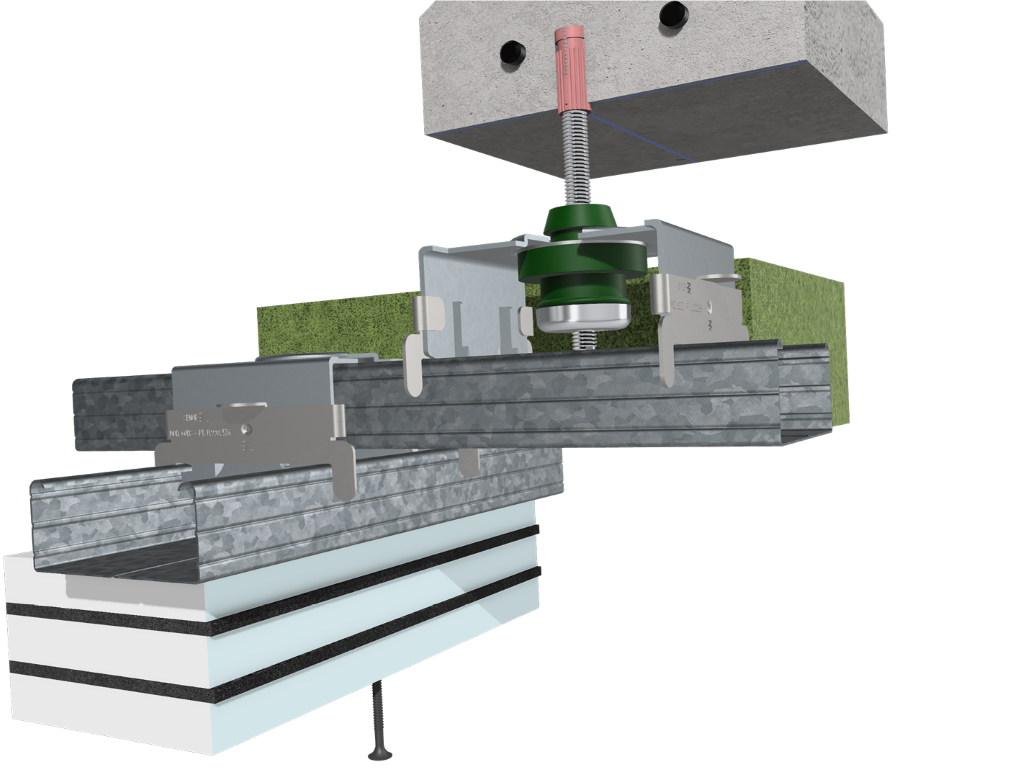
Option 1: Direct ceiling with SE-FTD isolators
- Minimal loss of space (very useful when space is limited).
- Isolators SE-FTD NIVEL 47 SENOR
- Decoupling strip SE-MONT-BICAPA-40 SENOR
- Acoustic strip SE-BEC-5×48 SENOR
- 50 mm sound-absorbing material (rock or mineral wool), with an approximate density of 30 kg/m³
- TC-47 profiles (45–48 mm)
- Two layers of standard 13 mm plasterboard
- 4 mm acoustic membrane between plasterboard layers
Option 2: Self-supporting ceiling with polymer (rubber) isolators
- Greater thickness means greater sound insulation
- Isolators SE-F-RAPID GM47 VDS2 SENOR
- Brackets (profile joining pieces) SE-F-RAPID 47DS2 SENOR
- Decoupling strip SE-MONT-BICAPA-40 SENOR
- Acoustic strip SE-BEC-6×80 SENOR
- 50 mm sound-absorbing material (rock or mineral wool), with an approximate density of 30 kg/m³
- TC-47 profiles (45–48 mm)
- Two layers of standard 13 mm plasterboard
- 4 mm acoustic membrane between plasterboard layers
Option 3: Self-supporting ceiling with hybrid isolators (rubber + spring)
- TOP solution for maximum sound insulation (best option)
- Isolator model SE-47MDS SENOR
- Brackets (profile joining pieces) SE-F-RAPID 47DS2 SENOR
- Decoupling strip SE-MONT-BICAPA-40 SENOR
- Acoustic strip SE-BEC-6×80 SENOR
- 50 mm sound-absorbing material (rock or mineral wool), with an approximate density of 30 kg/m³
- TC-47 profiles (45–48 mm)
- 2 layers of standard 13 mm plasterboard
- 4 mm acoustic membrane between plasterboard layers
🧱 Wall lining

Option 1: Direct wall lining with SE-FTD isolators
- Minimal loss of space (very useful when space is limited)
- Isolators SE-FTD NIVEL 47 SENOR
- Decoupling strip SE-MONT-BICAPA-40 SENOR
- Acoustic strip SE-BEC-5×48 SENOR
- 50 mm sound-absorbing material (rock or mineral wool), with an approximate density of 30 kg/m³
- TC-47 profiles (45–48 mm)
- Two layers of standard 13 mm plasterboard
- 4 mm acoustic membrane between plasterboard layers
Option 2: Self-supporting wall lining with rubber isolators
- Greater thickness means greater sound insulation
- Isolators SE-3803/TD1 SENOR
- Acoustic plug SE-TAV-500/11A (azul) SENOR for horizontal floor channels and vertical channels
- Acoustic plug SE-TAV-500/11R (rojo) SENOR for horizontal ceiling channels
- Decoupling strip SE-MONT-BICAPA-40 SENOR
- Acoustic strip SE-BEC-8×80 SENOR
- 50 mm sound-absorbing material (rock or mineral wool), with an approximate density of 30 kg/m³
- 48 mm profiles (tracks and studs)
- Two layers of standard 13 mm plasterboard
- 4 mm acoustic membrane between plasterboard layers
Option 3: Self-supporting wall lining with hybrid isolators (rubber + spring)
- TOP solution for maximum sound insulation (best option)
- Isolator model SE-4800/TDM SENOR
- Acoustic plug SE-TAV-500/11A (azul) SENOR for horizontal floor channels and vertical channels
- Acoustic plug SE-TAV-500/11R (rojo) SENOR for horizontal ceiling channels
- Decoupling strip SE-MONT-BICAPA-40 SENOR
- Acoustic strip SE-BEC-8×80 SENOR
- 50 mm sound-absorbing material (rock or mineral wool), with an approximate density of 30 kg/m³
- 48 mm profiles (tracks and studs)
- Two layers of standard 13 mm plasterboard
- 4 mm acoustic membrane between plasterboard layers
🦶 Floor
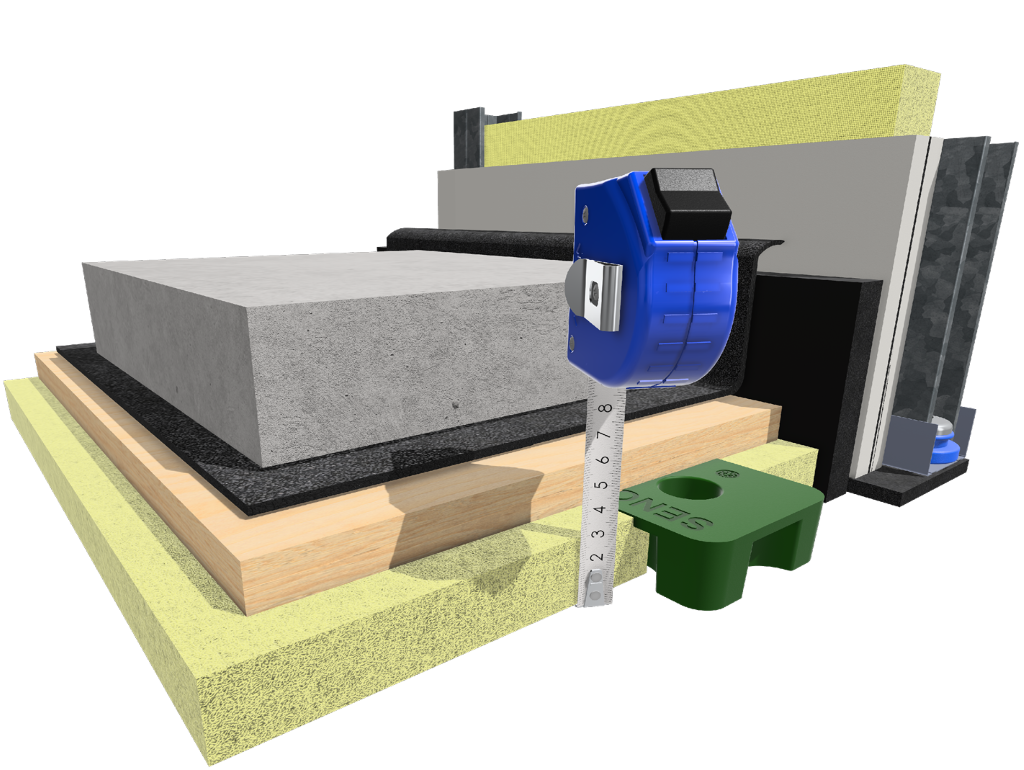
Option 1: Acoustic wood floor with rubber isolators
- Lightweight floor (very useful when a high load cannot be added)
- Isolator model SE-TSC SENOR
- Acoustic strip SE-BEC-10×48 SENOR
- 50 mm sound-absorbing material (rock or mineral wool), with an approximate density of 30 kg/m³
- Two layers of 16 mm moisture-resistant MDF boards
- 4 mm acoustic membrane between boards
Option 2: Acoustic wood floor with rubber isolators + timber battens
- Greater thickness means greater sound insulation.
- Isolators SE-FTD RASTREL L SENOR
- Acoustic strip SE-BEC-10×48 SENOR
- Double layer of 50 mm sound-absorbing material (rock or mineral wool), with an approximate density of 30 kg/m³
- 40 × 40 mm pine battens
- Two layers of 16 mm moisture-resistant MDF boards
- 4 mm acoustic membrane between boards
Option 3: Acoustic wood floor with hybrid isolators (rubber + spring) + timber battens
- TOP solution for maximum insulation in lightweight floors (best option).
- Isolator model SE-TBMF/TWINS
- Acoustic strip SE-BEC-10×48 SENOR
- Double layer of 50 mm sound-absorbing material (rock or mineral wool), with an approximate density of 30 kg/m³
- 40 × 70 mm pine battens
- Two layers of 16 mm moisture-resistant MDF boards
- 4 mm acoustic membrane between boards
Option 4: Acoustic concrete floor with rubber isolators
- Concrete floor (excellent insulation)
- Isolator model SE-TS 80 (3 cm thick) or model SE-TS 60 (6 cm thick)
- Acoustic strip SE-BEC-10×135 SENOR
- 50 mm sound-absorbing material (rock or mineral wool), with an approximate density of 30 kg/m³
- 16 mm moisture-resistant MDF boards
- 4 mm acoustic membrane over the boards
- 150 × 150 × 5 mm welded wire mesh
- 6 cm reinforced concrete
Option 5: Acoustic concrete floor with hybrid isolators (rubber + spring) + capsule
- Concrete floor TOP solution for maximum insulation (best option).
- Isolator model SE-BM-100 + capsule SE-CÁPSULA BCP/100
- Acoustic strip SE-BEC-10×135 SENOR
- Double layer of 50 mm sound-absorbing material (rock or mineral wool), with an approximate density of 30 kg/m³
- 16 mm moisture-resistant MDF boards
- 4 mm acoustic membrane over the boards
- 150 × 150 × 5 mm welded wire mesh
- 10 cm reinforced concrete
NOTES:
- Polymer (rubber) isolators help attenuate medium-to-high frequencies. Hybrid isolators (rubber + spring) attenuate the entire frequency range (low–mid–high).
- The thickness of the solutions also affects acoustic performance: the greater the thickness, the greater the sound insulation.
- Recommended wall-lining materials for heights of up to 3 m.
- We have indicated the most common size for self-supporting ceiling isolators (size 6), but the same types of isolators are also available in size 8.
- We also offer isolators and systems for partitions (please contact us).
- En trasdosados y tabiques si previamente se ha realizado el aislamiento en el techo, podemos prescindir del tapón acústico SE-TAV-500/11R (rojo) ya que el techo ya se encuentra aislado. Igualmente ocurre en los encuentros verticales de trasdosados y tabiques con el SE-TAV-500/11A (azul), ya que el encuentro de un trasdosado con otro ya aislado no precisa la instalación de estos tapones acústicos azules.
- We have also specified the use of TC-47 profiles, but isolator models are available for other profile types (TC-60, saw-tooth, long-span, etc.).
- Tracks and studs in other sizes (70 mm, 90 mm, etc.) can also be used.
- Using acoustic plasterboard, thicker plasterboard or more layers of plasterboard will improve acoustic performance (more mass means greater insulation).
- The recommended solutions and materials have been designed based on our knowledge and experience. It is important to note that these are not the only possible solutions, as multiple combinations of different materials can be used. Our aim is for this article to serve as a useful guide.
- Contact us for personalised advice based on your needs.

🚪 Doors and windows: the most critical points in soundproofing
Las puertas y ventanas are the most sensitive elements of the system, and the places where insulation can most easily be compromised if they are not treated properly.
Here are some key recommendations:
- ✅ Use high-quality models, specifically designed for soundproofing.
- 🚫 Avoid installing roller shutter boxes, as they can create sound leaks that are difficult to correct.
- 💡 An effective alternative is to choose double doors and double windows, separated by an air gap.
- 🔍 You can find online specialist manufacturers of doors and windows that offer certified solutions and can advise you according to your needs.
👉 Remember: it does not matter how much you invest in walls and ceilings if you then install a hollow door or a poorly sealed window.
🎯 Factors, materials and practical tips for good soundproofing
- MASS
- This is provided by plasterboard (PYL). At least two layers should always be used.
- Acoustic membranes such as ViscoLAM 65 (ChovA) , M.A.D. 4 (DANOSA) , TECSOUND (SOPREMA) or similar products also add mass and provide a noise barrier.
- ELASTICITY
- Never connect elements rigidly: it is essential to use acoustic isolators at the connections and install high-quality acoustic strips around the entire perimeter.
- AIRTIGHTNESS
- Poorly sealed joints or cracks can ruin the entire system.
- Acoustic strips ensure an airtight seal, and it is essential to carry out joint treatment (tape + joint compound) on all plasterboard layers.
- ABSORPTION COEFFICIENT
- Choosing the right mineral wool is essential.
- 👉 Read our guide to choosing the right material:
Practical guide to choosing a good sound-absorbing material
- RIGIDITY
- The metal structure, the use of staggered double plasterboard layers and the isolators provide the rigidity needed for good results.
- WORKMANSHIP
- Poor installation can ruin the entire investment.
- It is essential to be properly informed before installationand then verify that the installation has been carried out correctly.
Other important recommendations:
- ⚠️ Be careful with sockets and weak points: these areas are highly susceptible to sound leaks
- 🚫 Beware of miracle products and misleading advertising: soundproofing is achieved with complete, high-quality systems, not individual components.
📚 We also recommend reading these articles to clarify key concepts:
🔊 And don’t forget the interior acoustic treatment…
Once the space has been soundproofed, you will need to control the interior acoustics. To do this, use:
- Absorber panels on walls and ceiling
- Difusores para evitar concentraciones de sonido
- Bass traps if there are resonance problems
- Or removable sound-absorbing ceilings. At SENOR we offer accessories (SE-SRC-M6), brackets (SE-TRN-M6) and isolators (SE-105/PCV M6) for installation.
💡 At SENOR can help you choose anti-vibration products and acoustic strips, and provide technical advice based on the type of space, budget and acoustic requirements.
📲 Need help?
Contact our Technical Department:
📧 tecnico@senor.es
📞 607 411 620
And if you would like to see real examples, visit our YouTube channel: 🎥 SENOR Acoustic Isolators